
Here is the recipe for some tasty Jacktrip 1.3.0 and all the fixings on a fresh Raspberry Pi.
Don’t have a monitor/mouse/keyboard available to set up your Pi? Jump to the bottom of this post for some notes on how to do the whole thing without connecting anything to the Pi. Then come back here.
This part of the page presumes a standard RPi install off of the Imager app. Hopefully running an Ethernet cable connection rather than WiFI.
Start loading software. First up is Qjackctl because it will bring Jack in along with it. Do it through Preferences/Add-Remove Software. Search on “qjackctl”, tick the box and then click on “OK” (which is cut off in this picture but shows in the next one). Click on the picture to embiggen. For those of you more comfortable with Terminal:
sudo apt install qjackctl

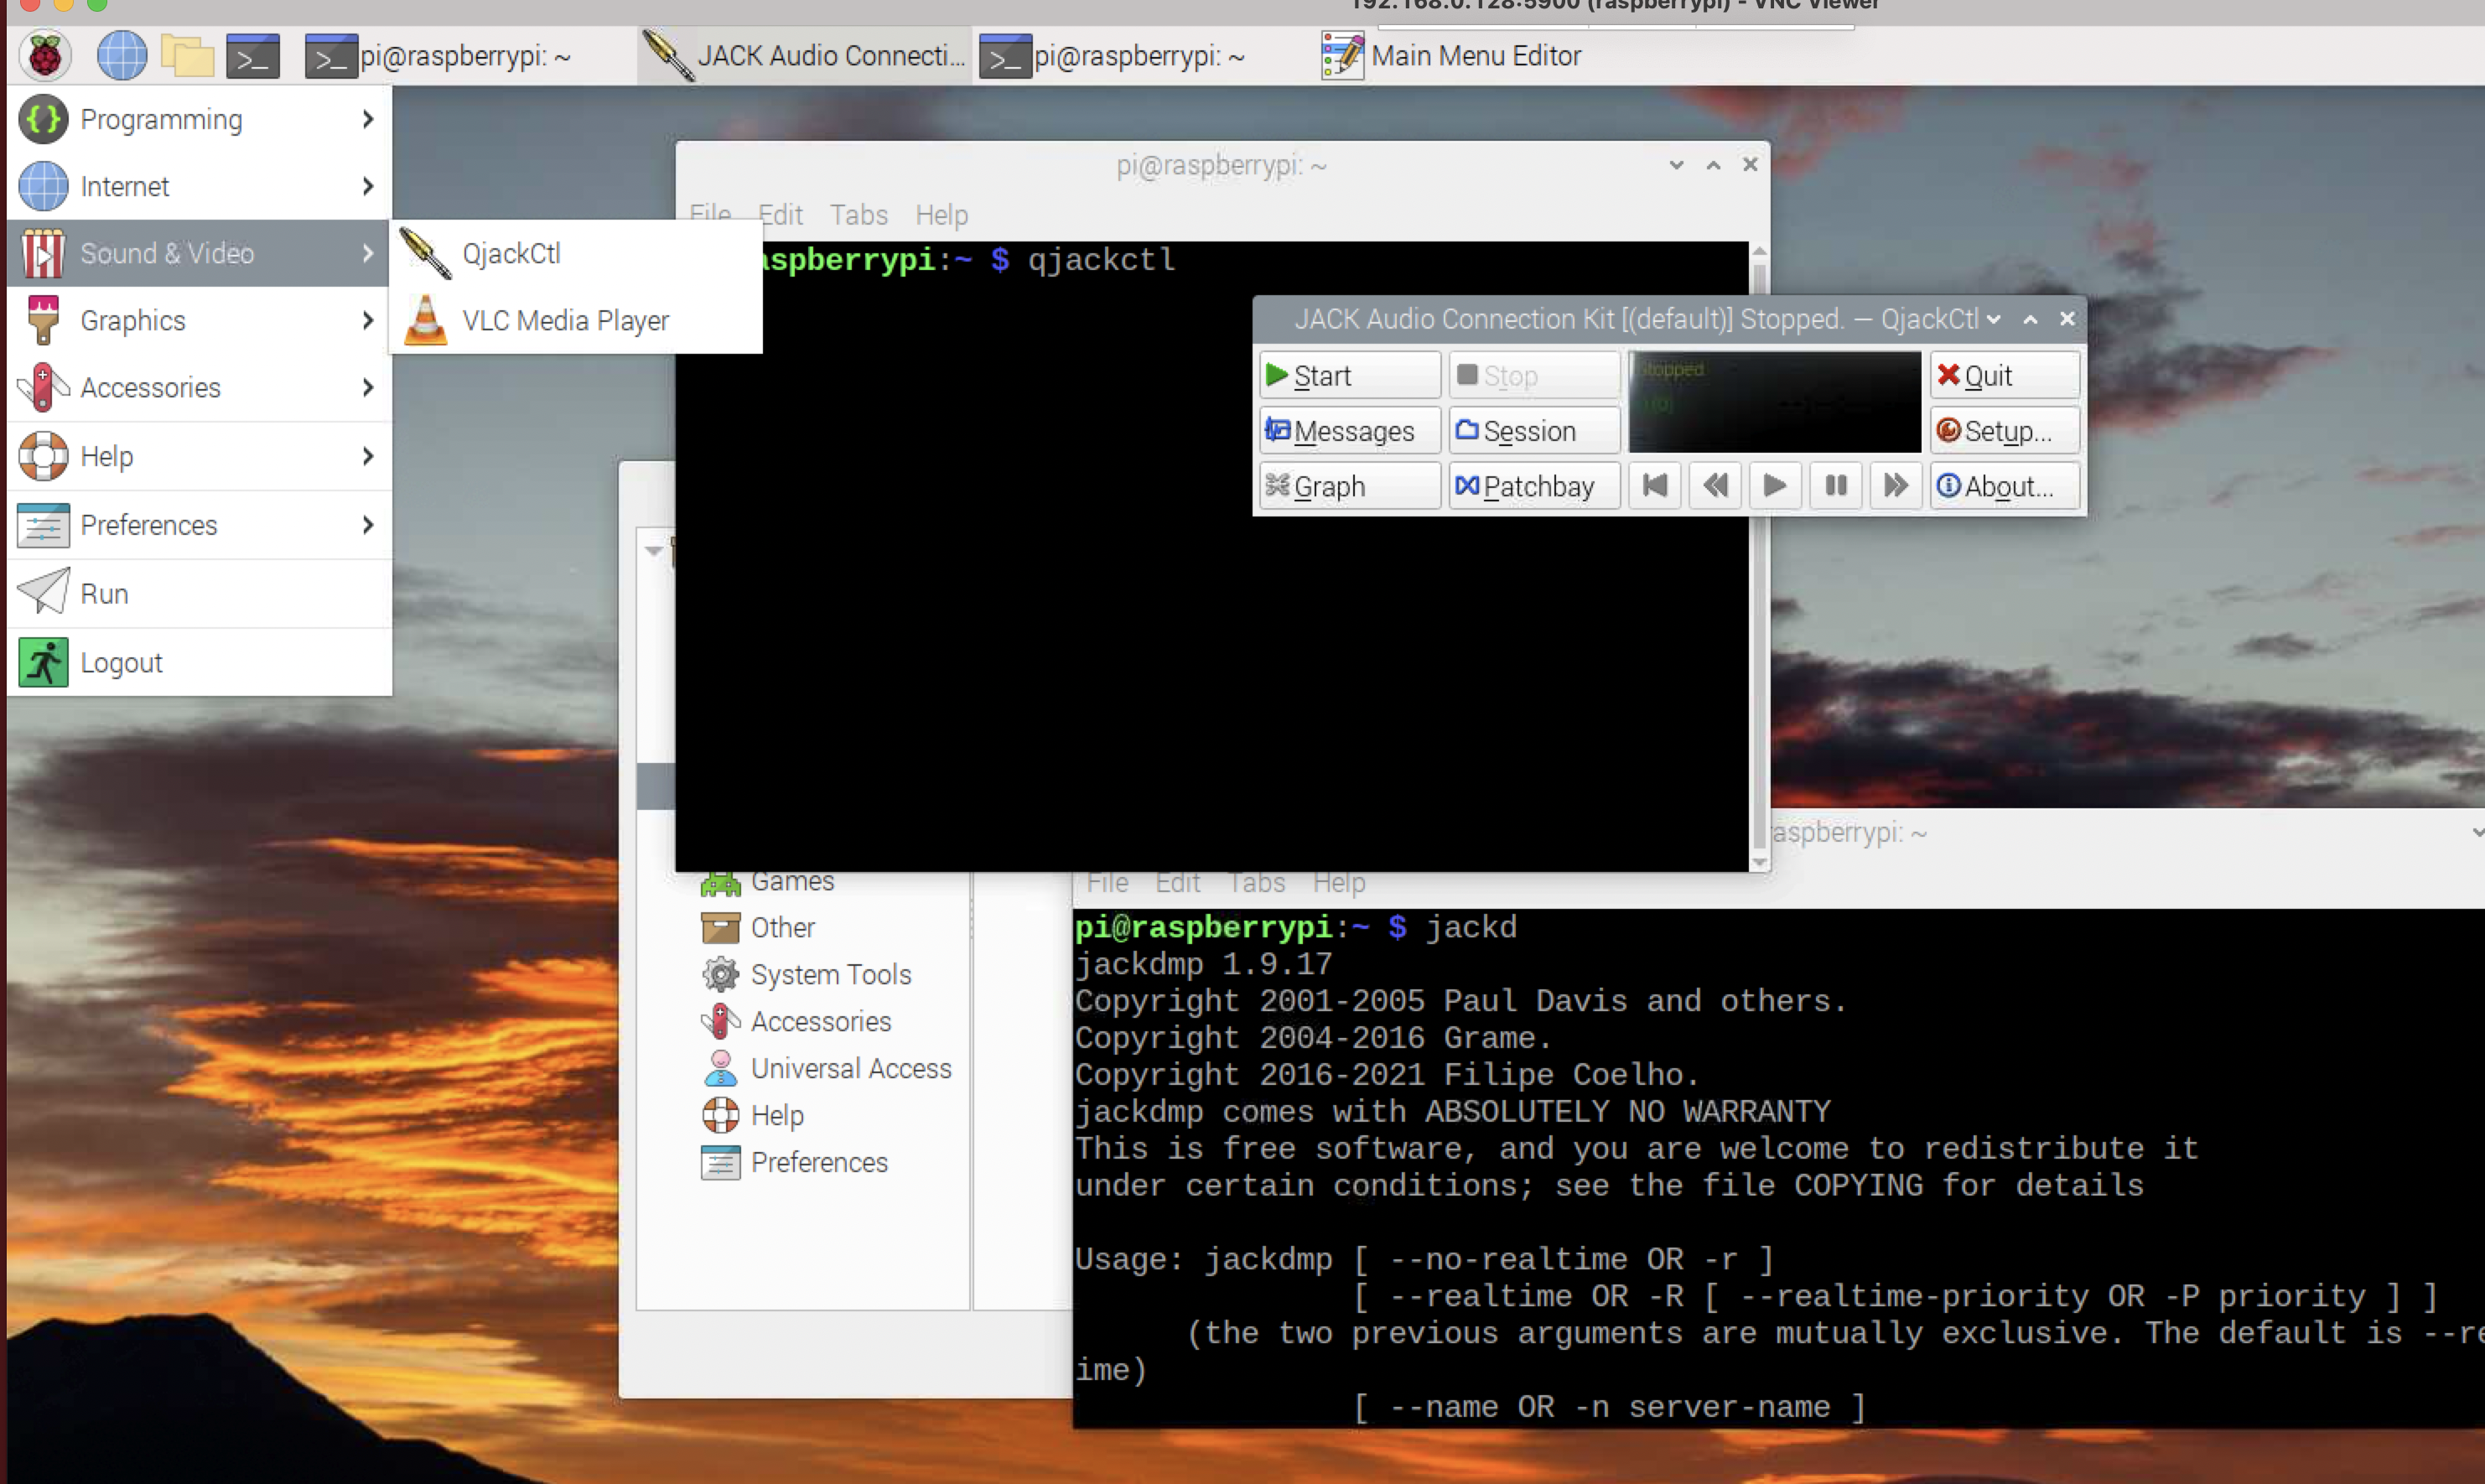
Qjackctl and jack are installed and Qjackctl can be started either from the command line or through the “Sound and video” menu (once you’ve added it to the menu).
Next up is Jacktrip. Do the same thing — search on jacktrip. Or…
sudo apt install jacktrip
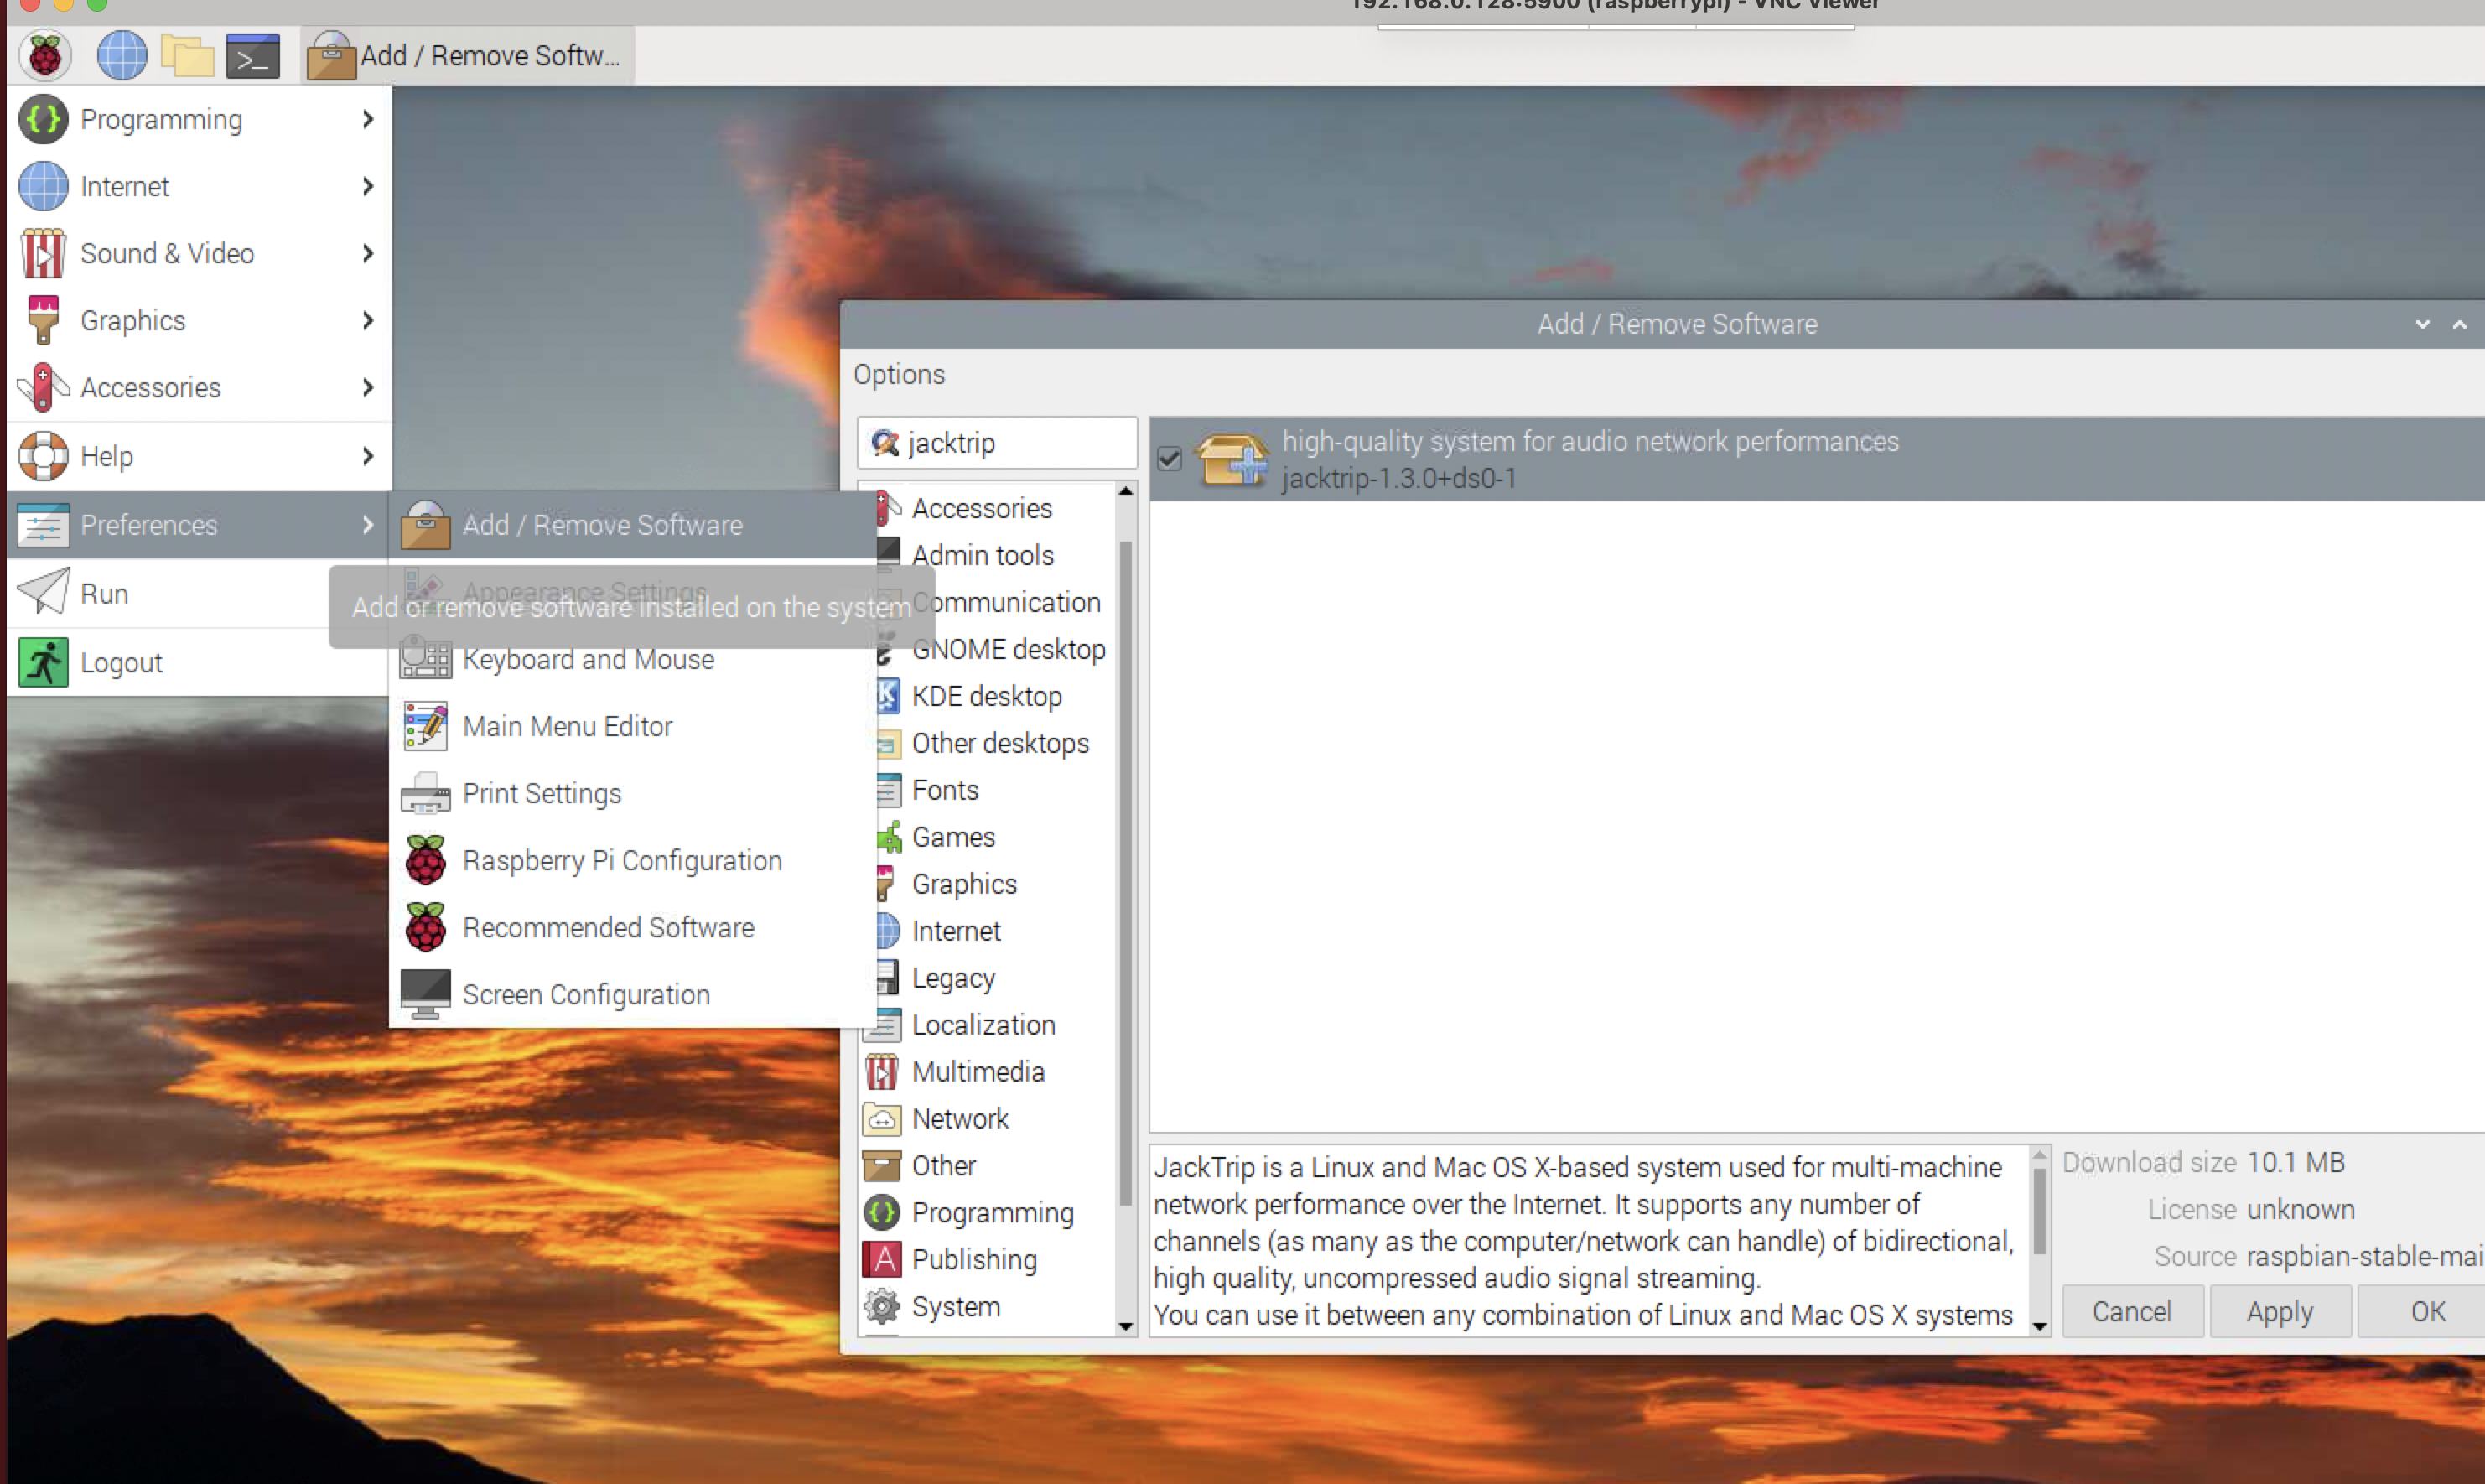
That will install Jacktrip 1.3.0 (as of this writing).

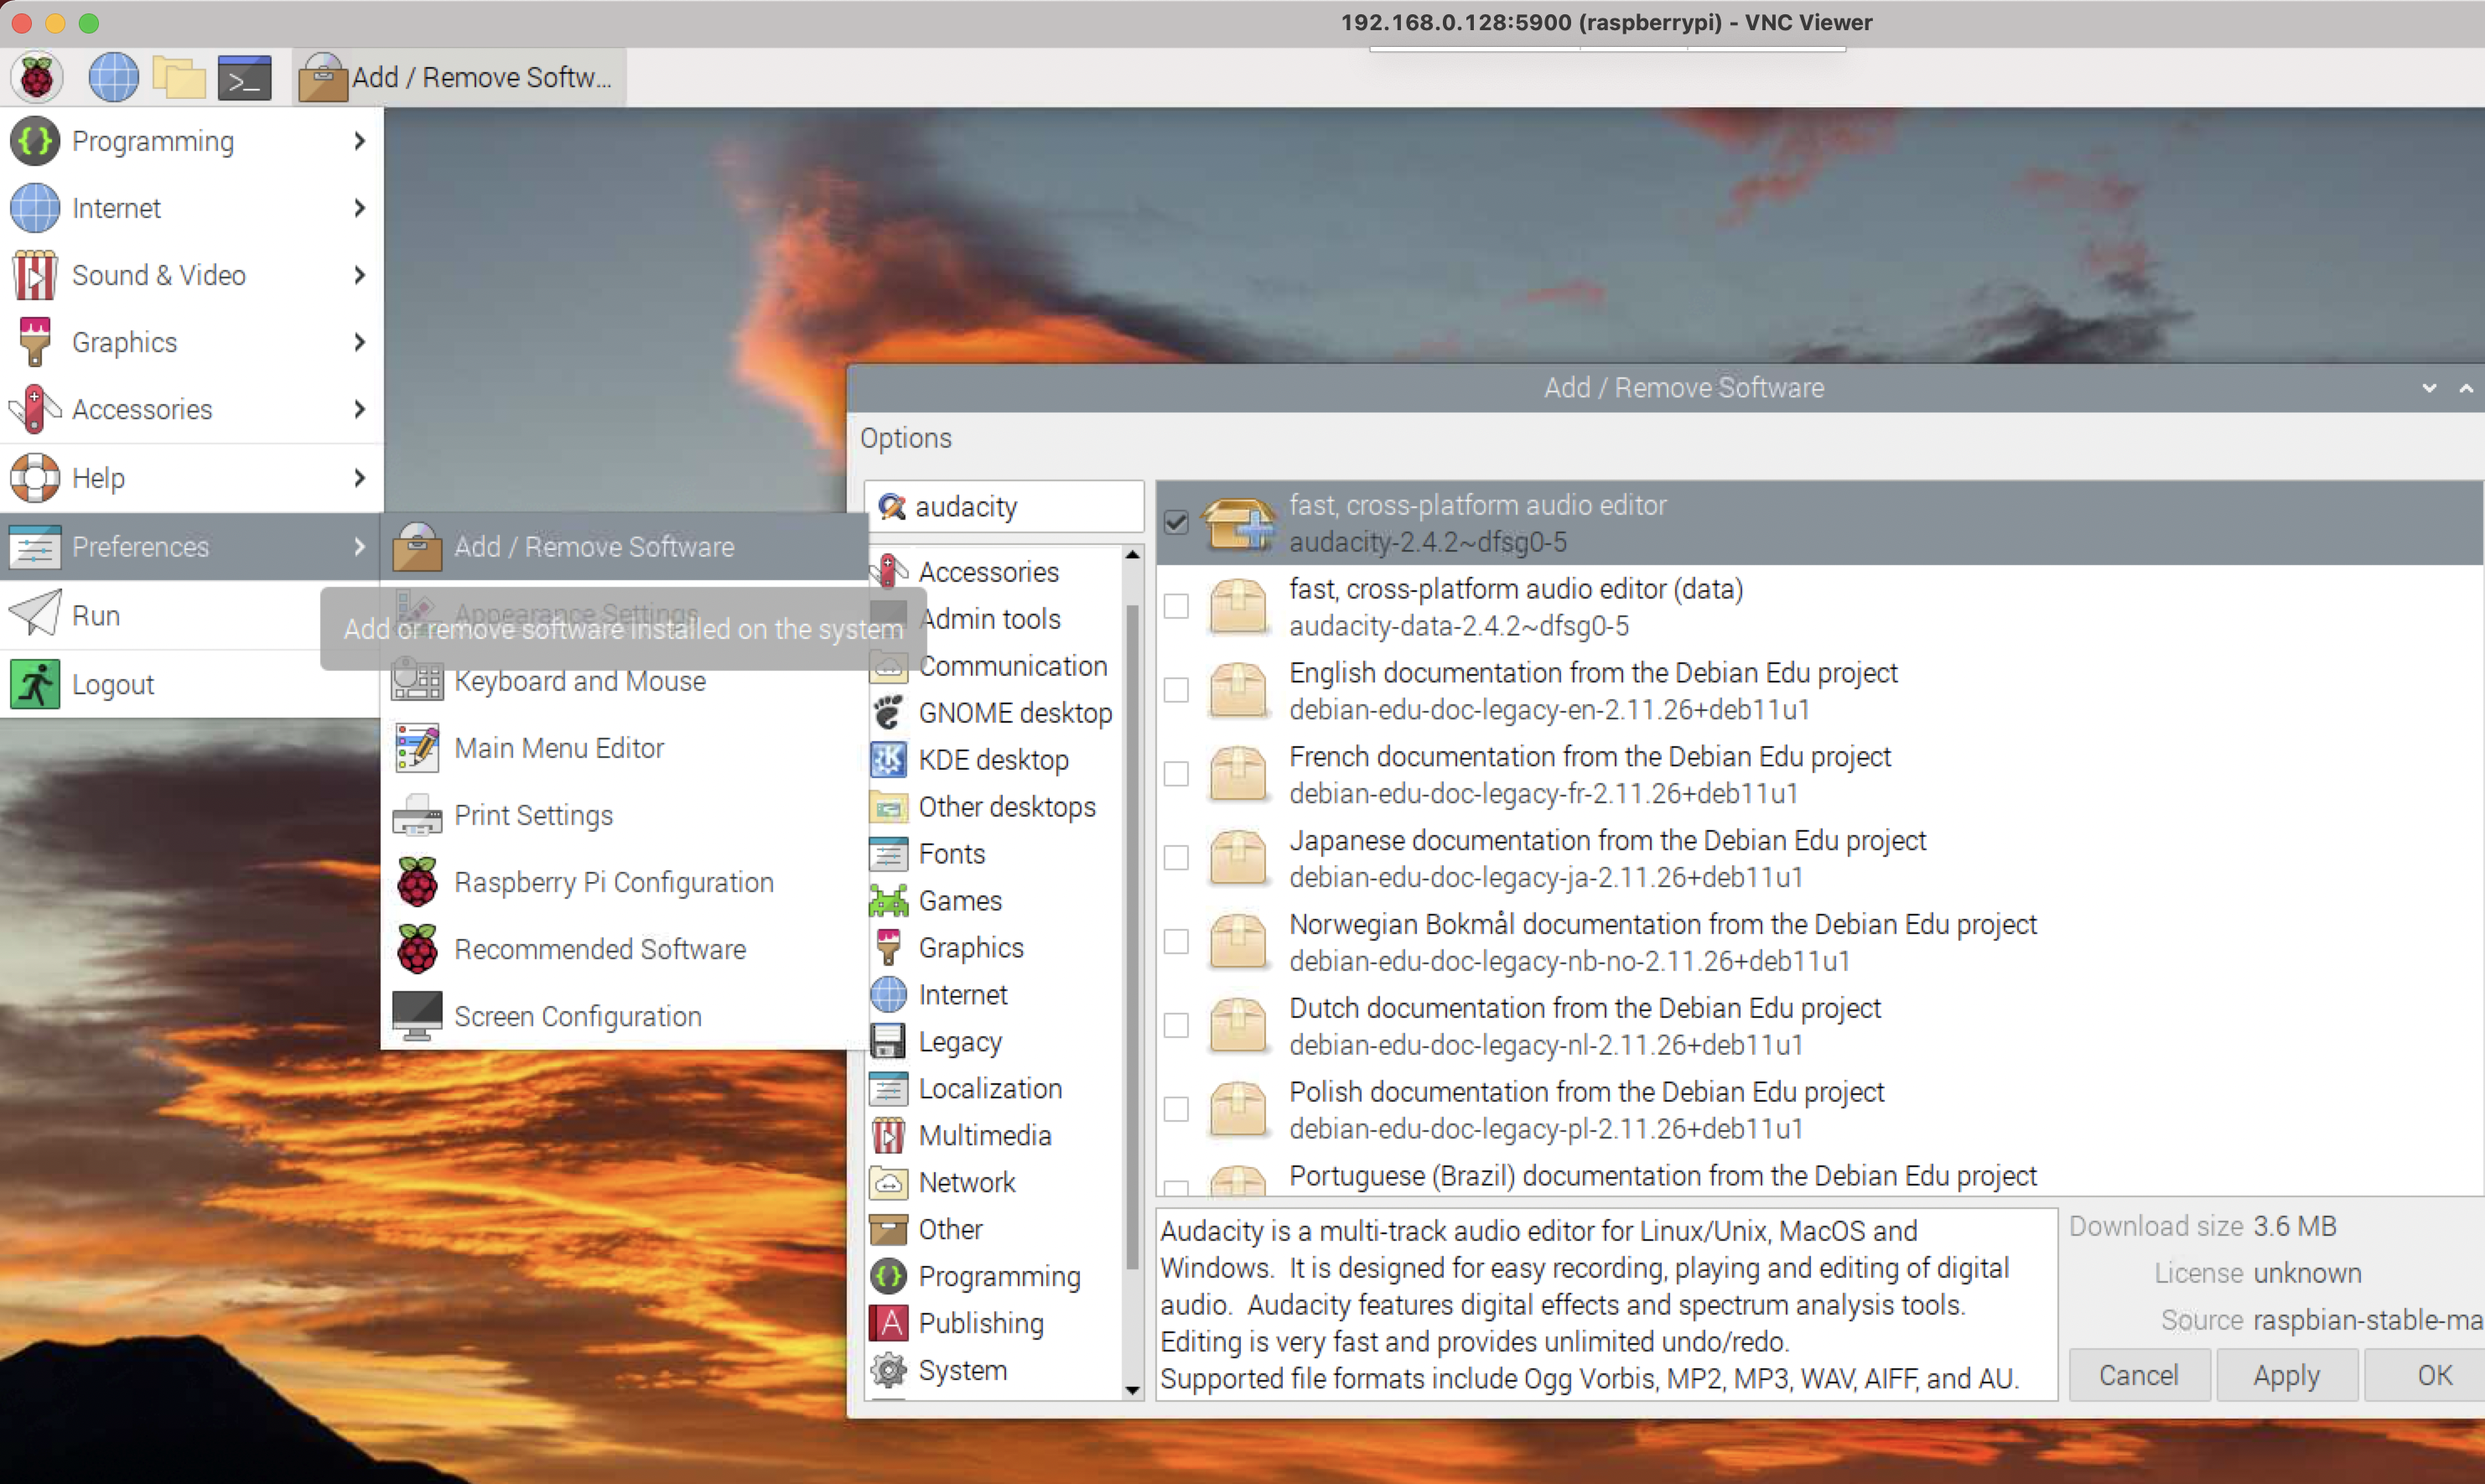
Here’s the same thing for Audacity…
sudo apt install audacity
Audacity gets a little cranky when it runs. I’ve looked up the error and it seems to be something that can be ignored.
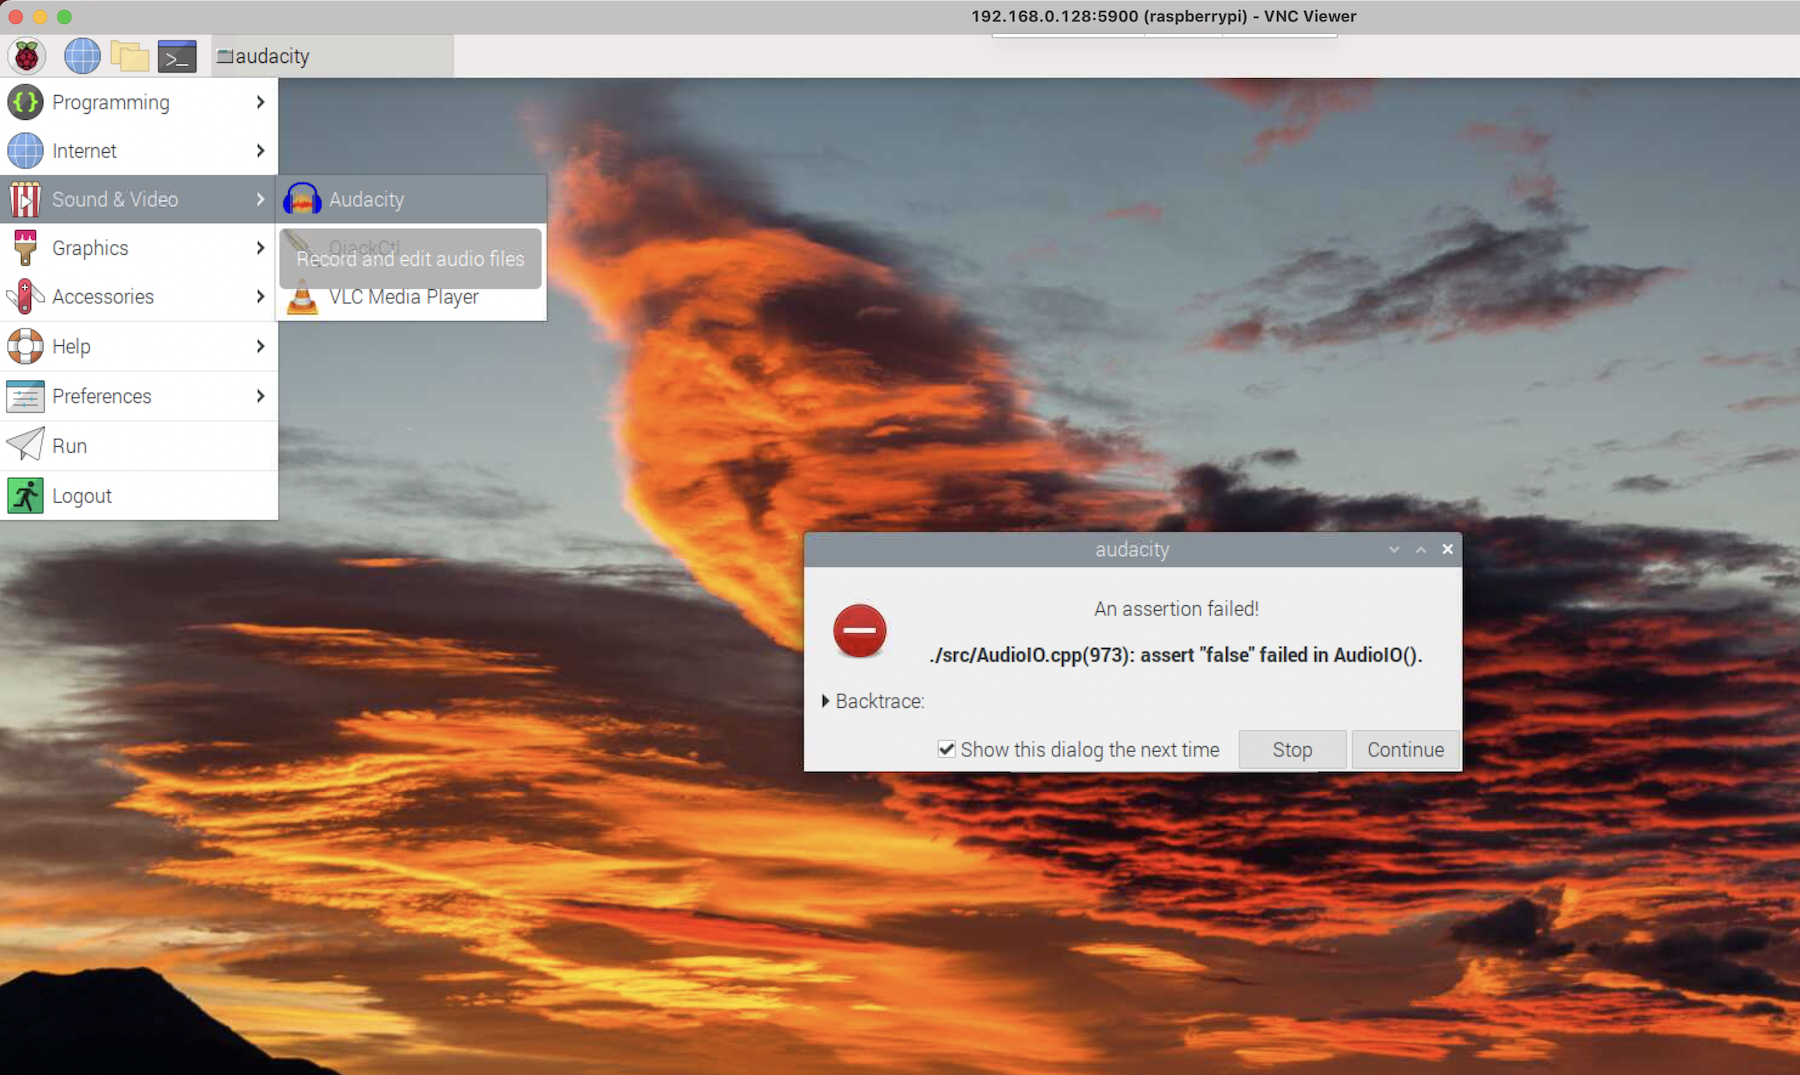
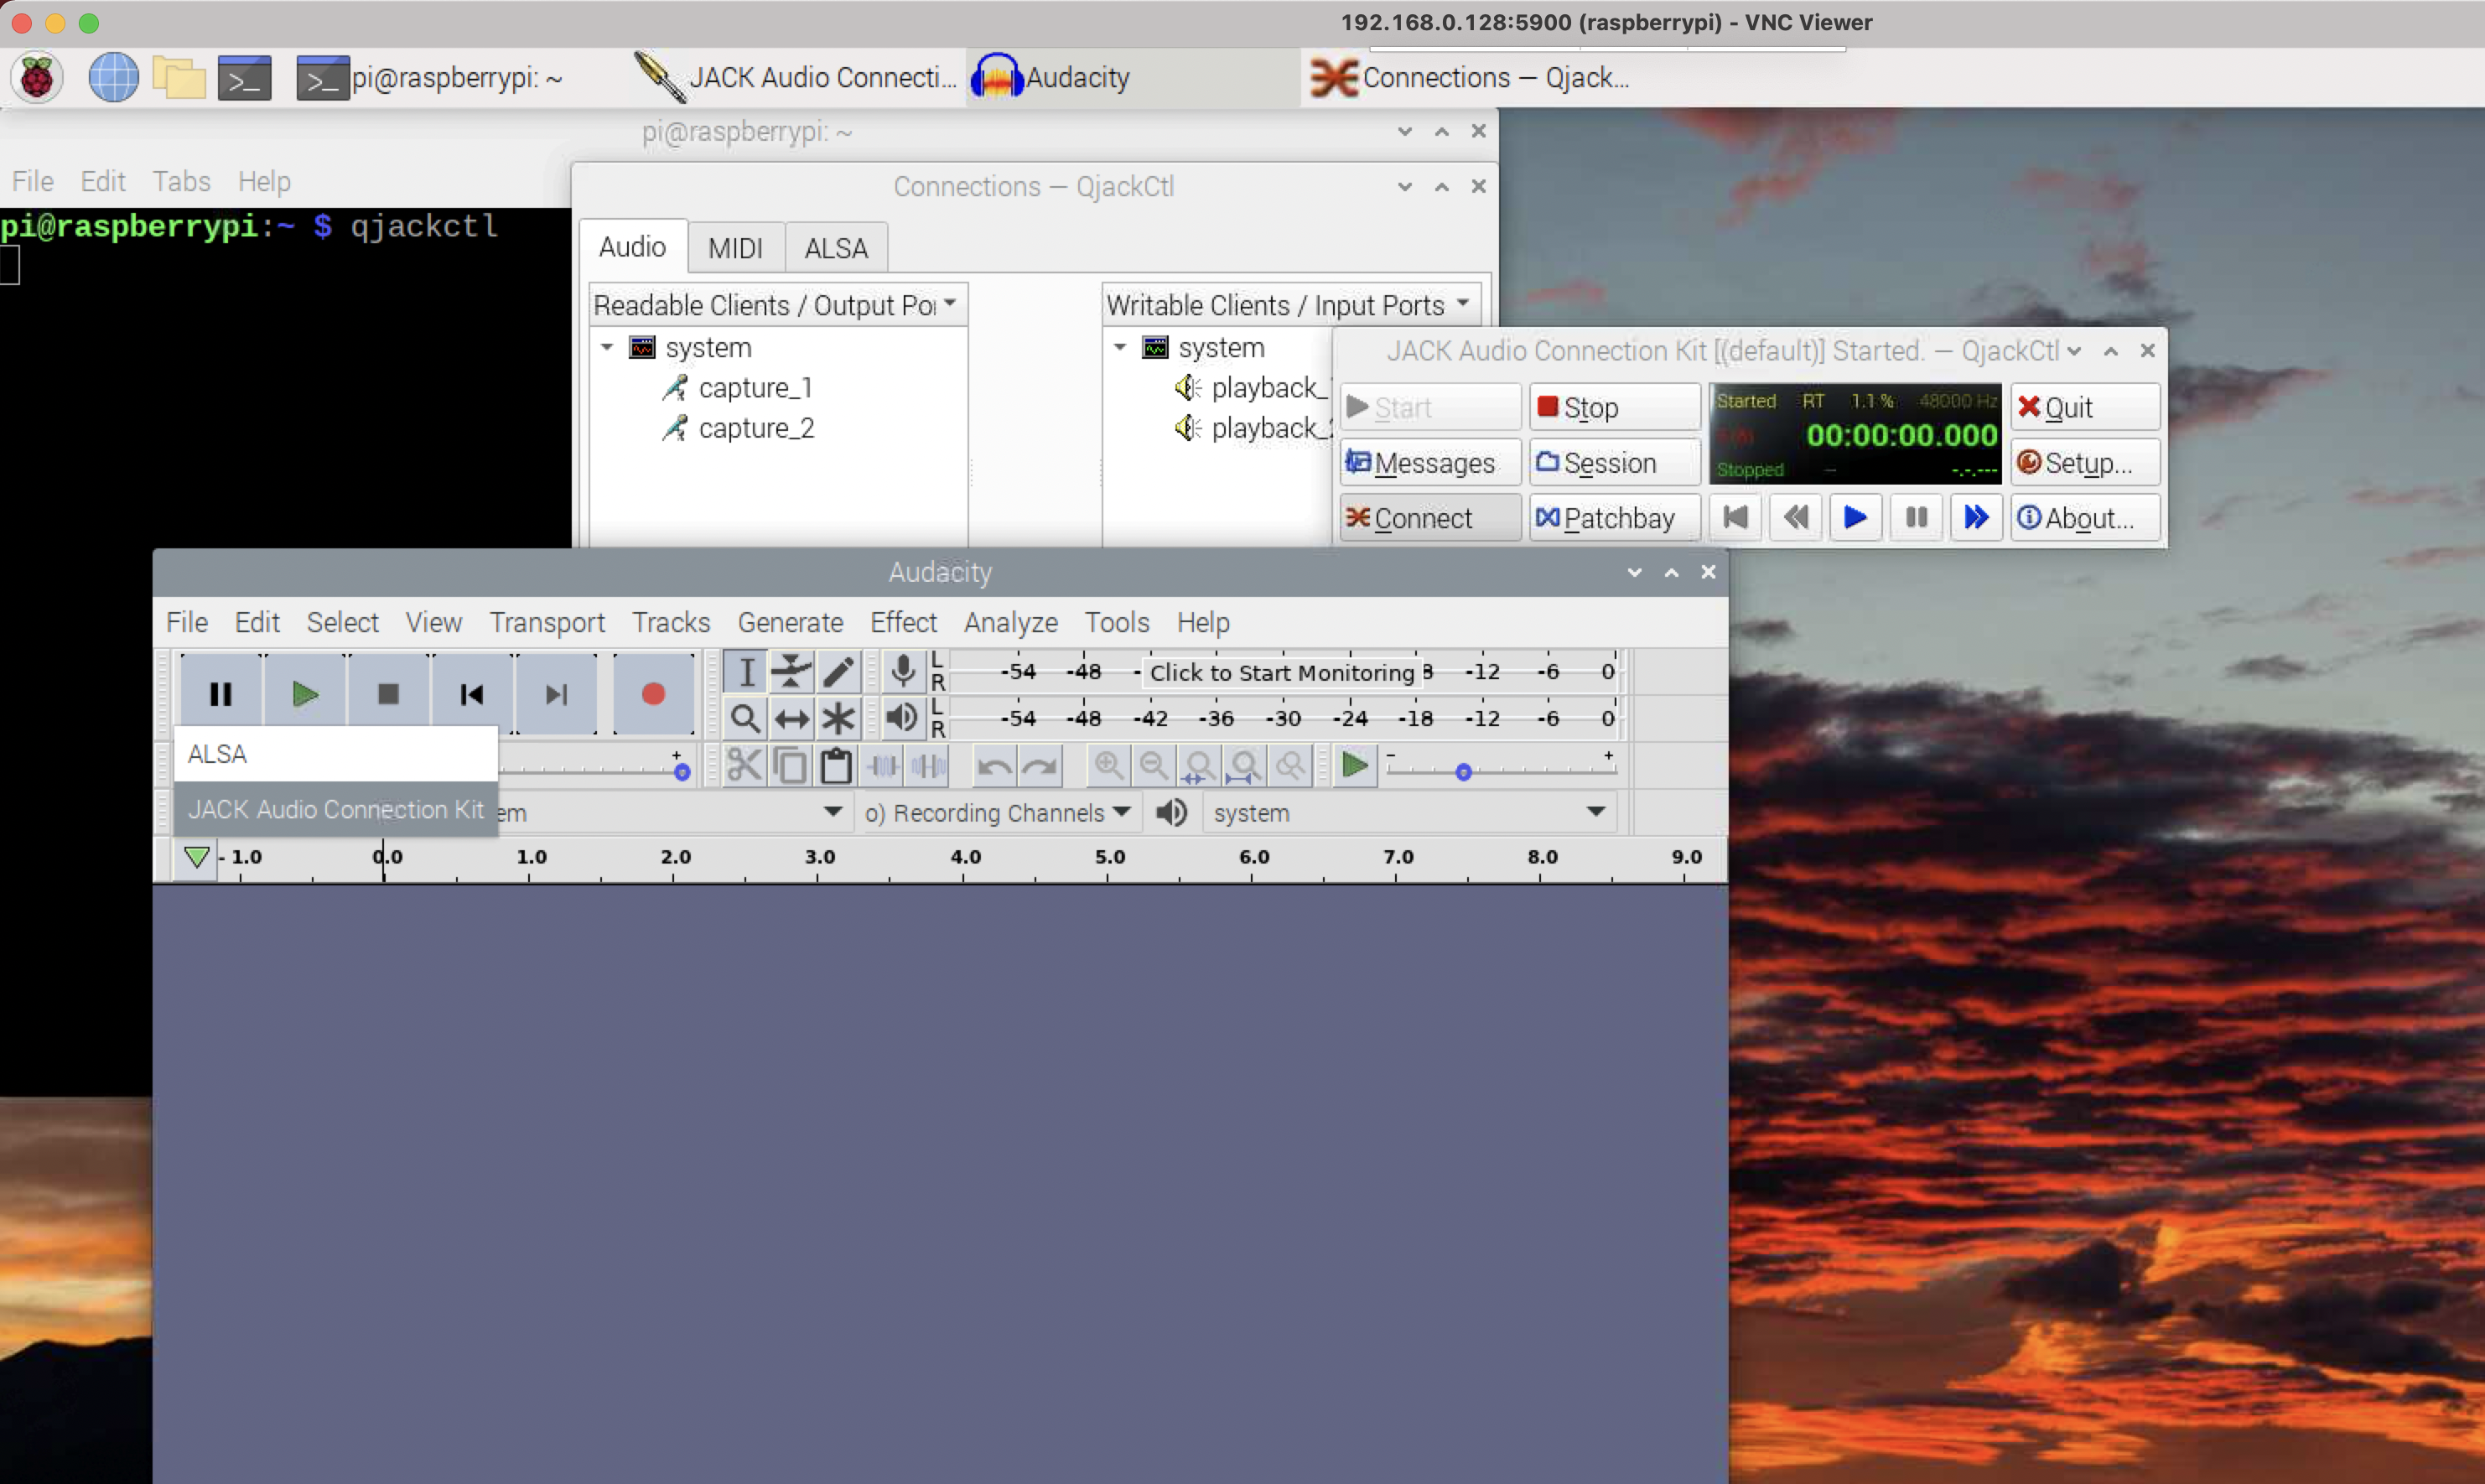
Here’s Audacity running, talking to Jack.
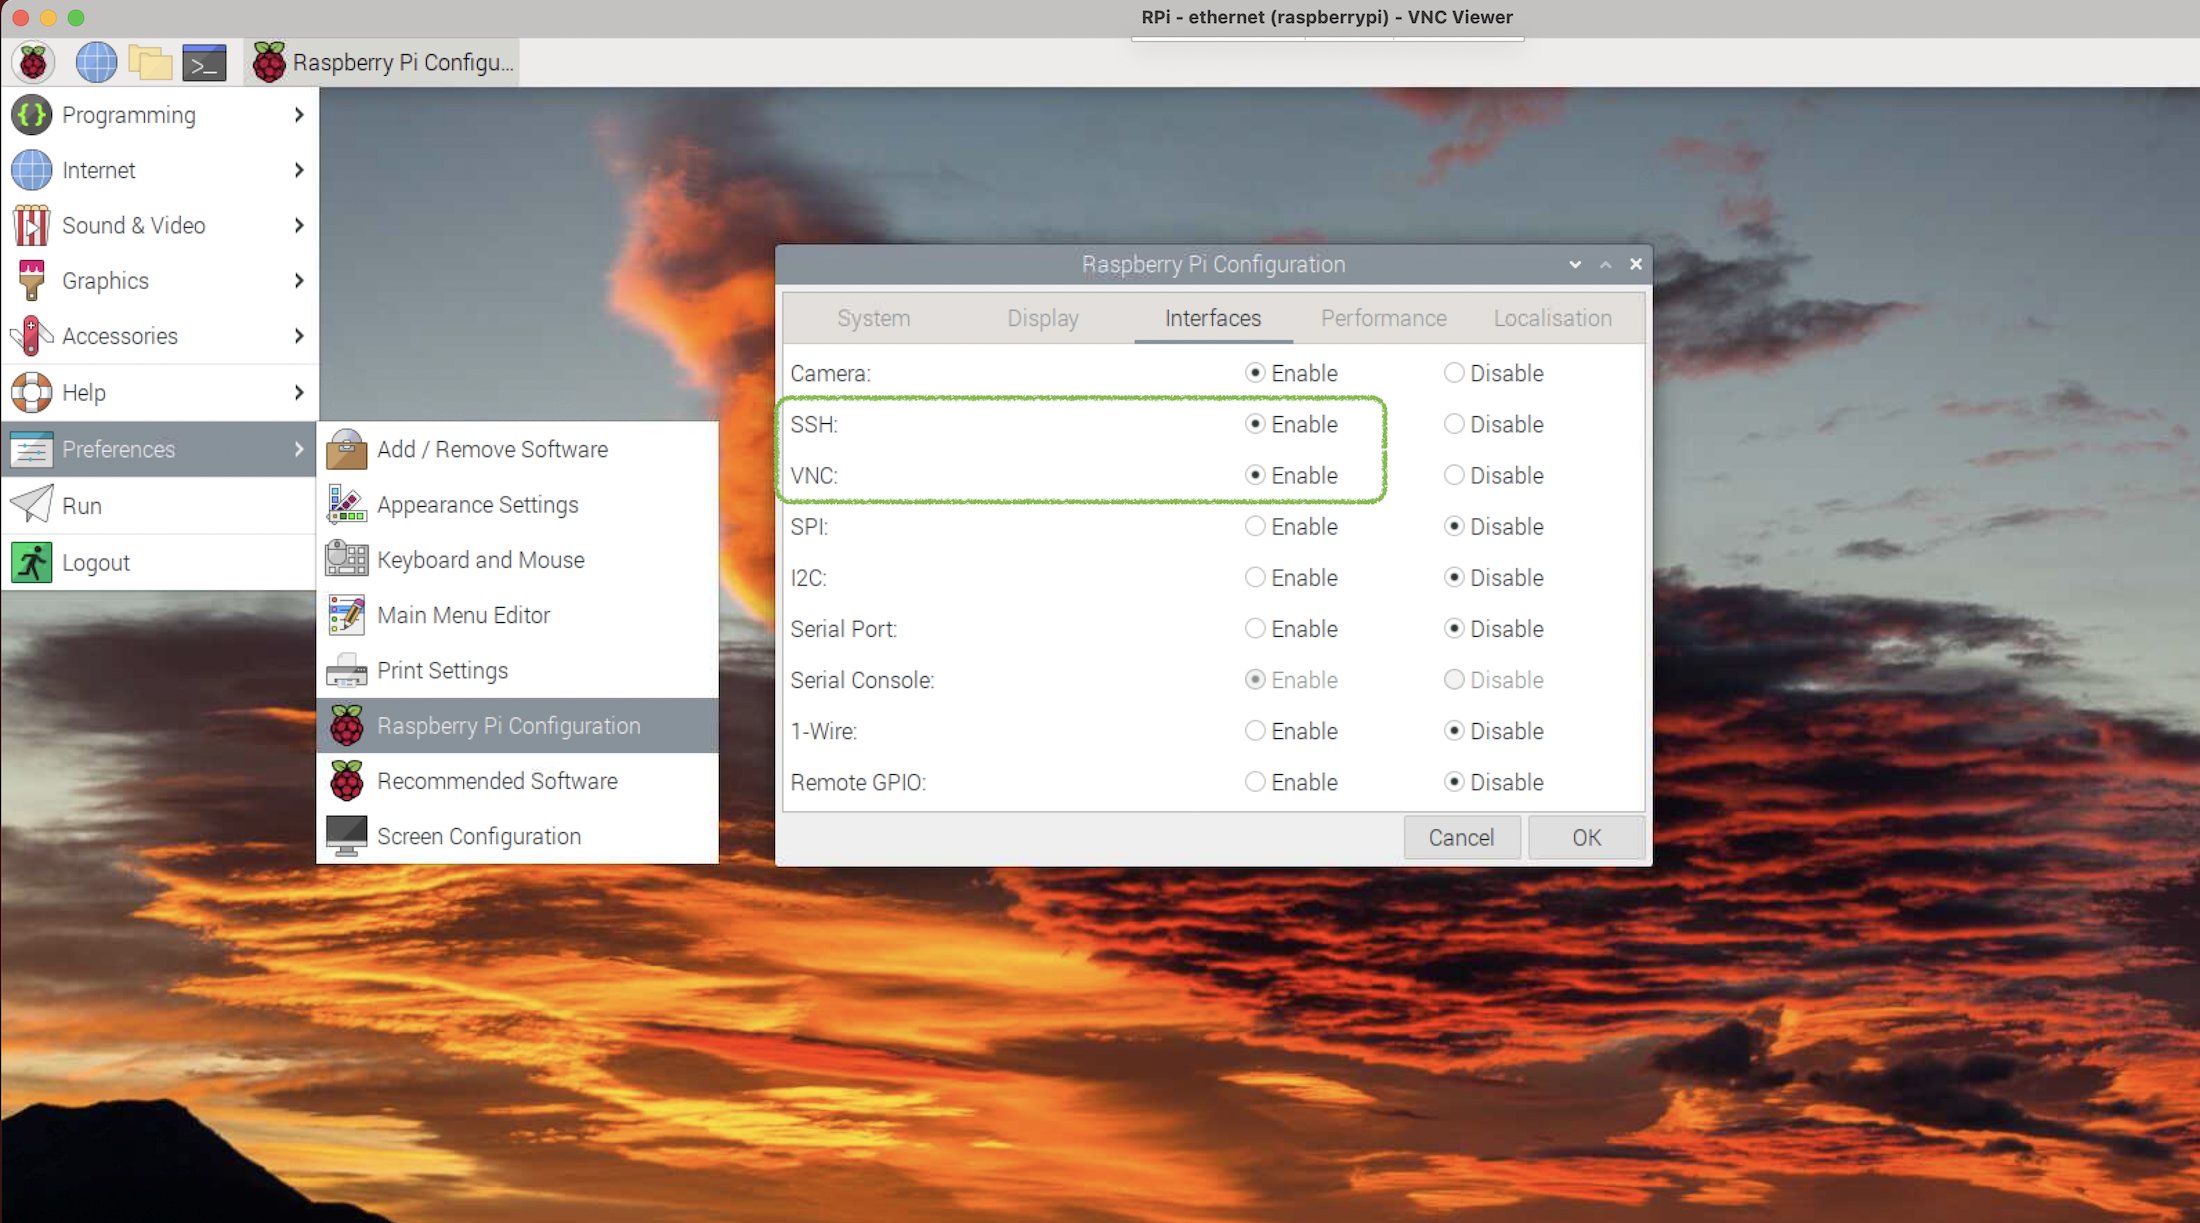
By ticking these two boxes (and restarting the Pi) you can connect to the Pi through SSH or VNC (which is what I’m using to take these screen shots on my Mac)
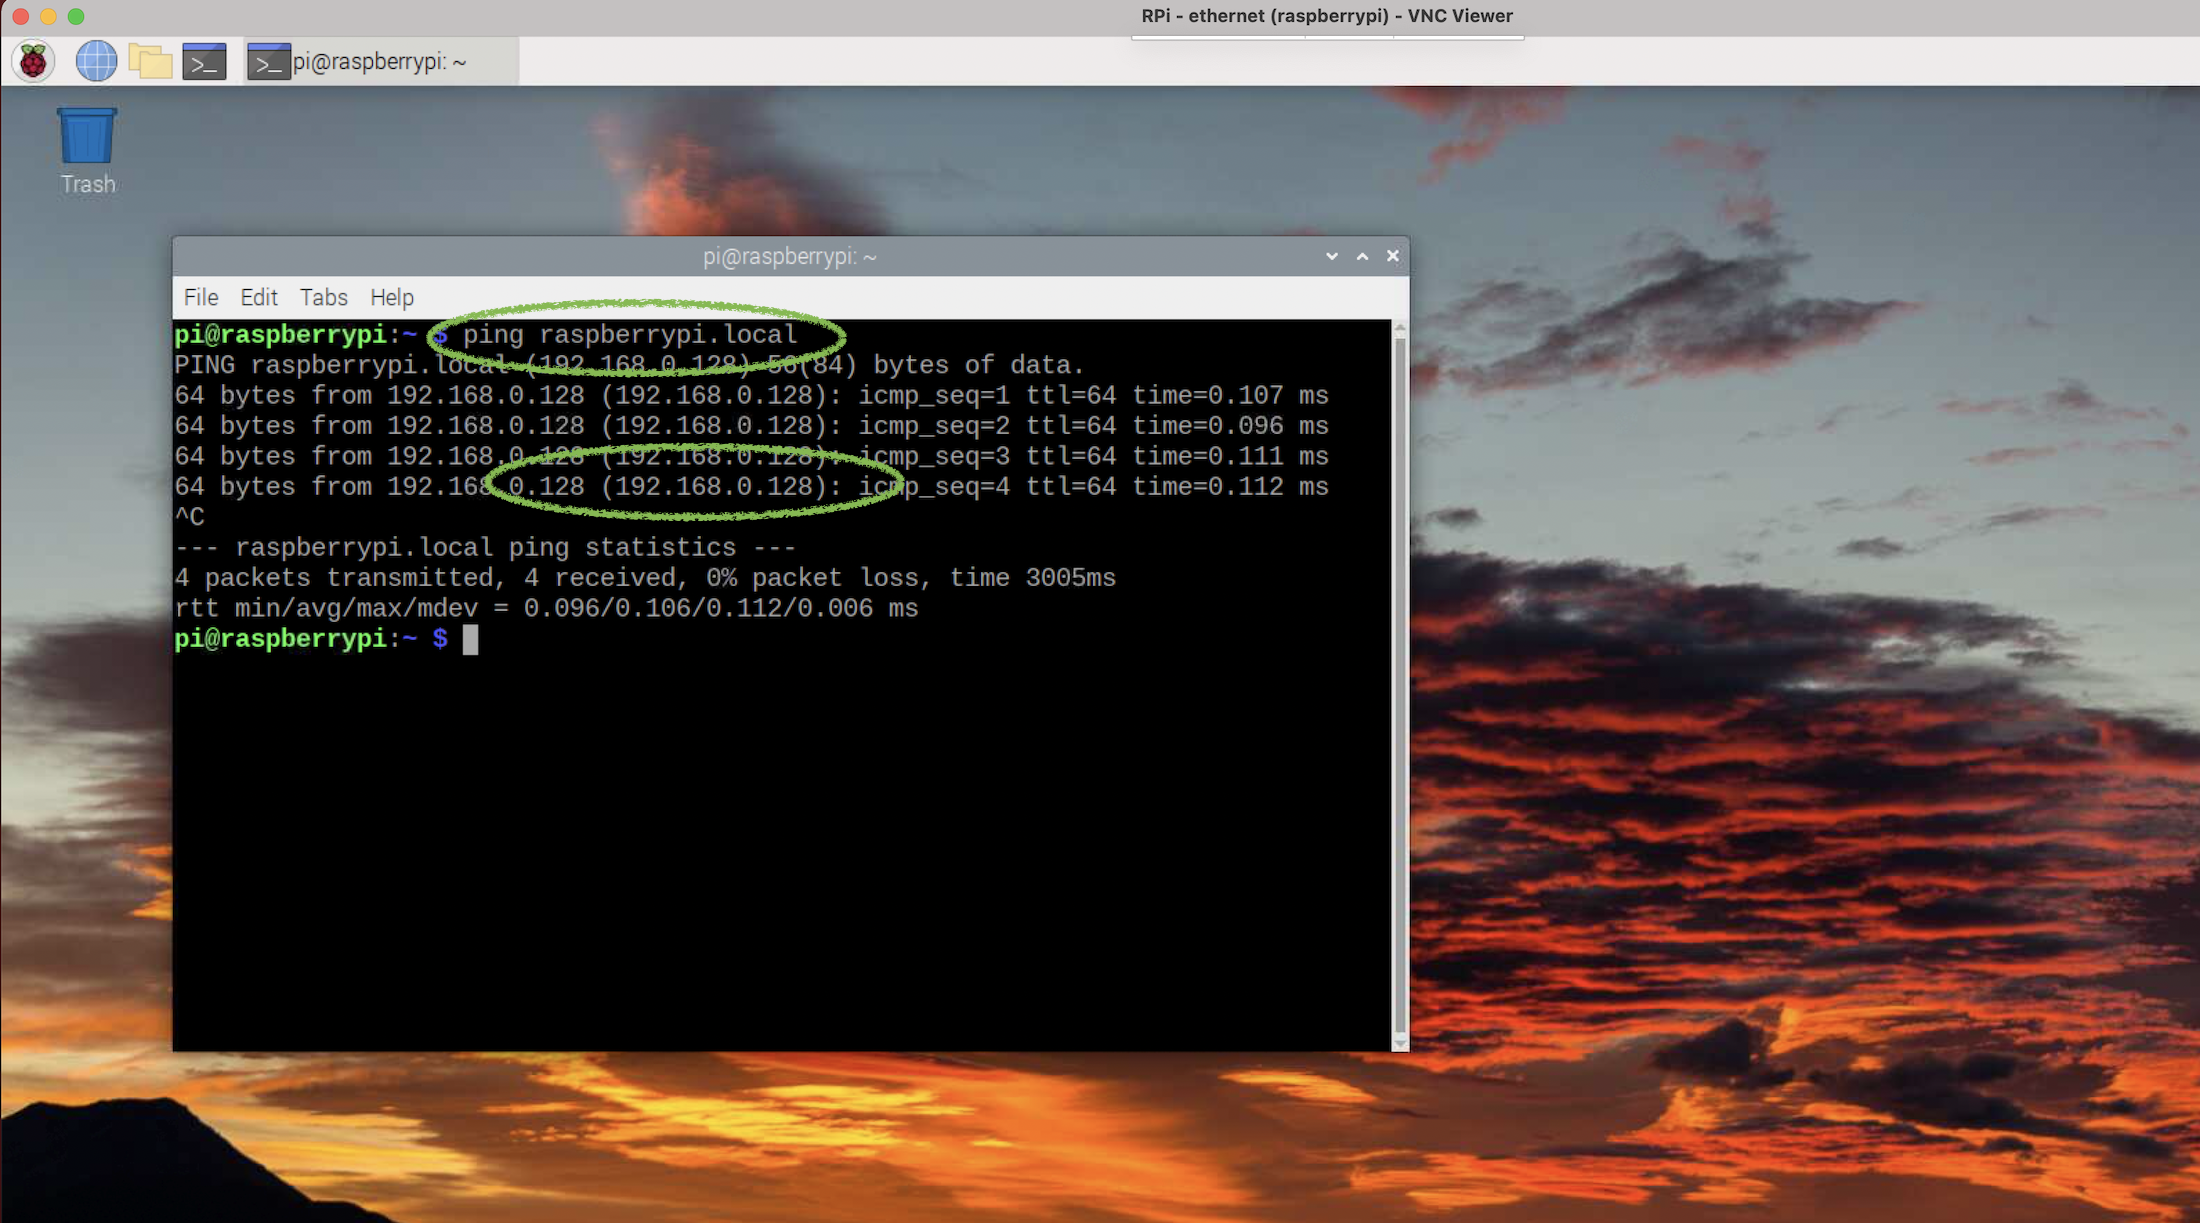
Here’s how to figure out what the IP address of the Pi is. Type ” ping raspberrypi.local ” into the command line and look below for the address.
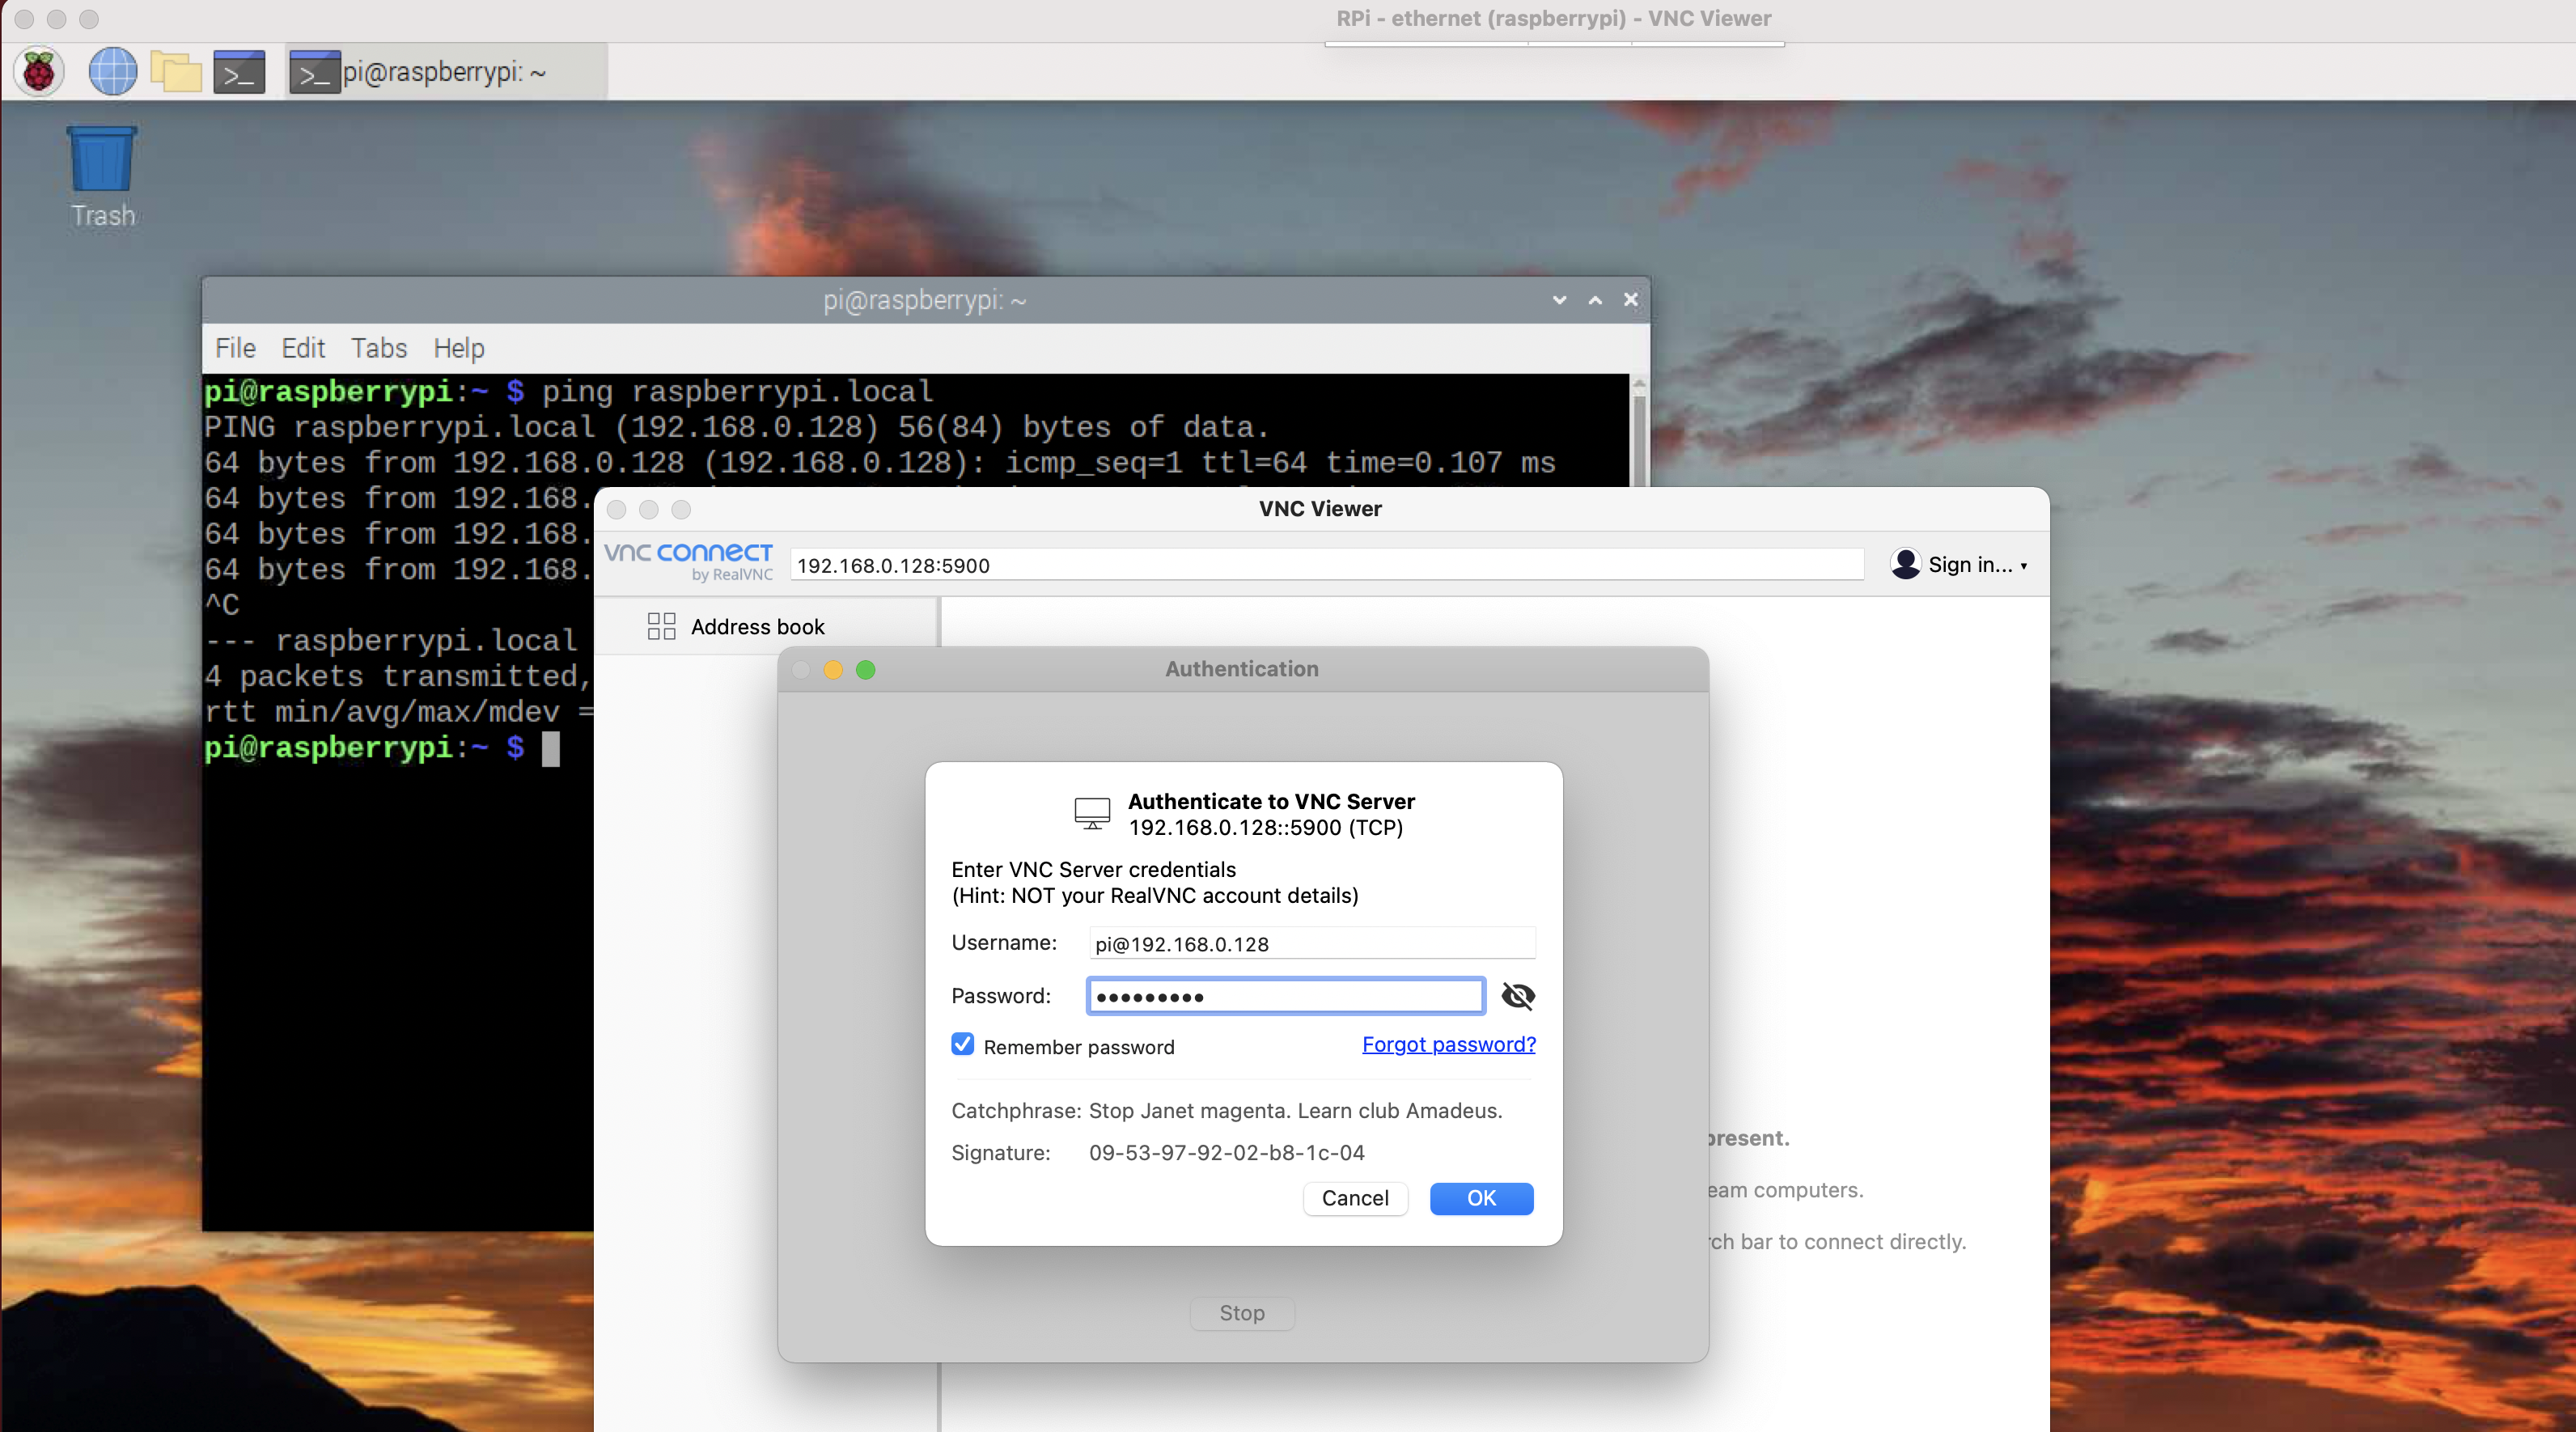
Here are the two ways to get in. If you like the command line, use SSH from your desktop machine. If you like VNC, go HERE to get the VNC viewer software that matches the server on the Pi and log in with it as shown. Bonus points — you can copy and paste between your computer and your Pi (by using “right-click” copy/paste commands) and you can transfer files using the drop down window at the top of the connection (not shown here).
Notes on setting up the Pi without connecting a mouse, monitor or keyboard to the Pi — aka “headless” setup.
I really like setting up the Pi this way — I don’t have to find a mouse, monitor and keyboard. If I was just getting started with a Pi and didn’t have all that stuff, buying it would triple the cost of the project.
Here is the reference that did it for me — and showed how to use a hidden menu to set everything up easily and correctly
https://raspberrypi-guide.github.io/getting-started/install-operating-system.html
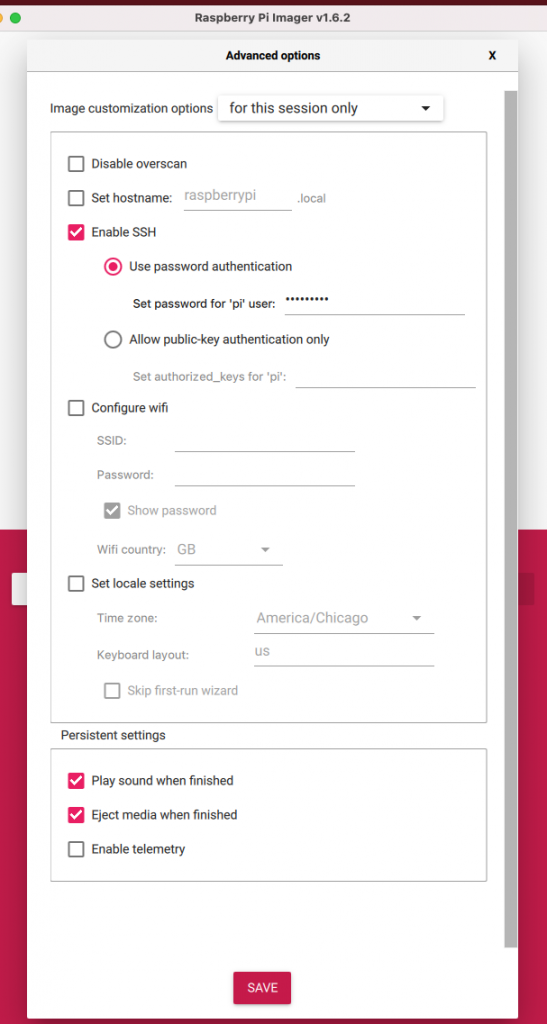
To access the hidden menu press ctrl+shift+x on windows and cmd+shift+x on a mac. Here’s what the hidden-menu looks like just before I write to the card. The only thing that matters for what follows is that you tick the “Enable SSH” option and set a password for the “pi” user. If you don’t configure wifi, you won’t be tempted to use it, and thus won’t accidentally have it on during a session (just sayin’).
— Connect the Ethernet and power cables
— Boot the Pi with the SD card
Booting the first time takes a little while, but eventually you can…
— Log in over WiFi
ssh pi@raspberrypi.local— Enable the VNC Server
sudo raspi-configNavigate to ‘Interfacing Options
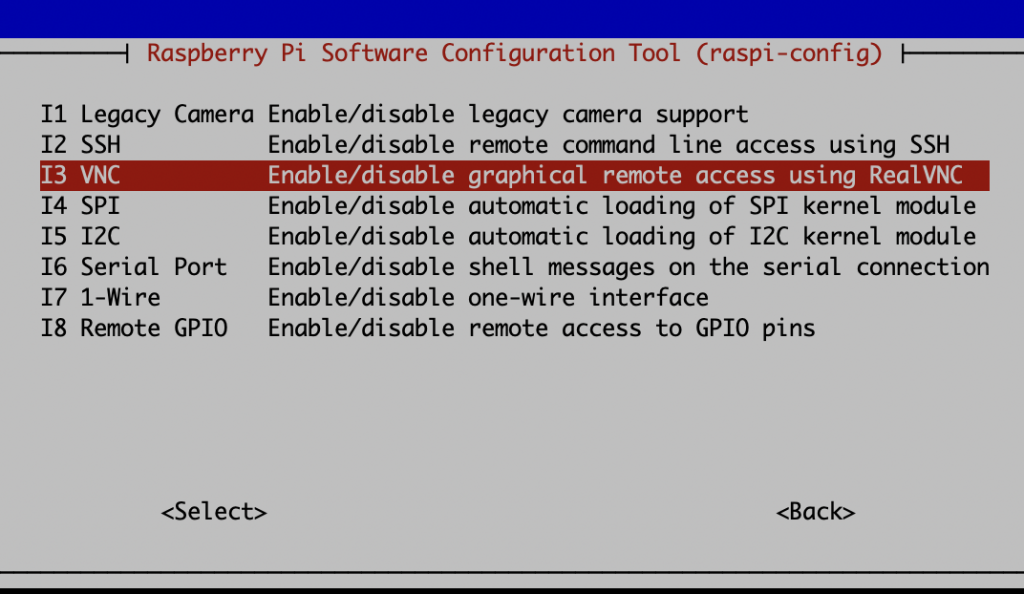
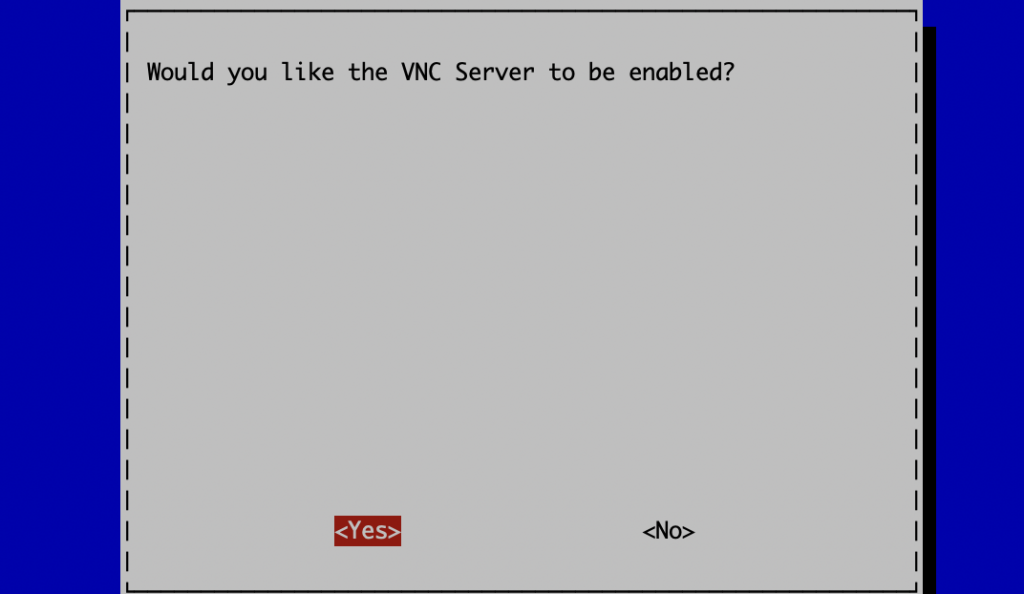
Select ‘VNC > Yes’
Navigate to ‘Display Options’
Select ‘VNC Resolution’ and pick a screen size you like to work with (I use the biggest, 1920×1080)
— Connect with VNC Client
Here’s how to figure out what the IP address of the Pi is. Type ” ping raspberrypi.local ” into the command line and look below for the address.
Use that IP address in the VNC Viewer. Put ‘:5900’ (the port number) on the end to complete the command